The Kyria has been available for a few months now, but it hasn’t gotten a proper introduction yet. I’ve been getting some questions about what inspired the Kyria, and why I made certain decisions in the design. After you’ve read this post, you’ll have learned why the Kyria is how it is, and I hope you’ll feel excited to take the Kyria for a spin, too (for free, you only need a printer!).
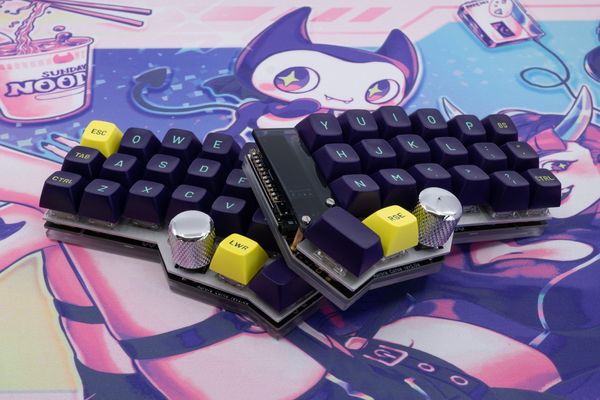
This is revision 1.0 of the Kyria, custom built for a customer. You can get your own Kyria PCB kit at splitkb.com!
A Journey
I’ve been using mechanical keyboards for about eight years now, starting with a Keyed Up Labs ES-87, and two years later also getting a CoolerMaster Novatouch. Both were so-called tenkeyless keyboards: A conventional shape, but lacking the number pad on the right side of the keyboard. I figured, since I never used the number pad, I wouldn’t miss it anyway.
As a software engineer, I’d been working on my computer all day. And when I got home, I’d resume my time behind the screen, playing games, writing or otherwise wandering about the internet. I never experienced issues with that, until I did: my fingertips would feel sore, and my wrists would hurt. This didn’t come as a surprise to me, and as I was already using a trackball mouse at the time (a Logitech M570), I was already familiar with ergonomical devices, so I figured there must be something similar for keyboards as there were for mice.
On social media, you may have read about the hobby of mechanical keyboards to be a bit of a rabbit hole, with endless layouts, switches, keycaps, firmware and then modifications on all that to choose from. Well, they aren’t wrong, there really is a lot to choose from and it can get quite overwhelming! Thankfully, taking it step by step is easy, and so the journey to finding a suitable ergonomical keyboard began.
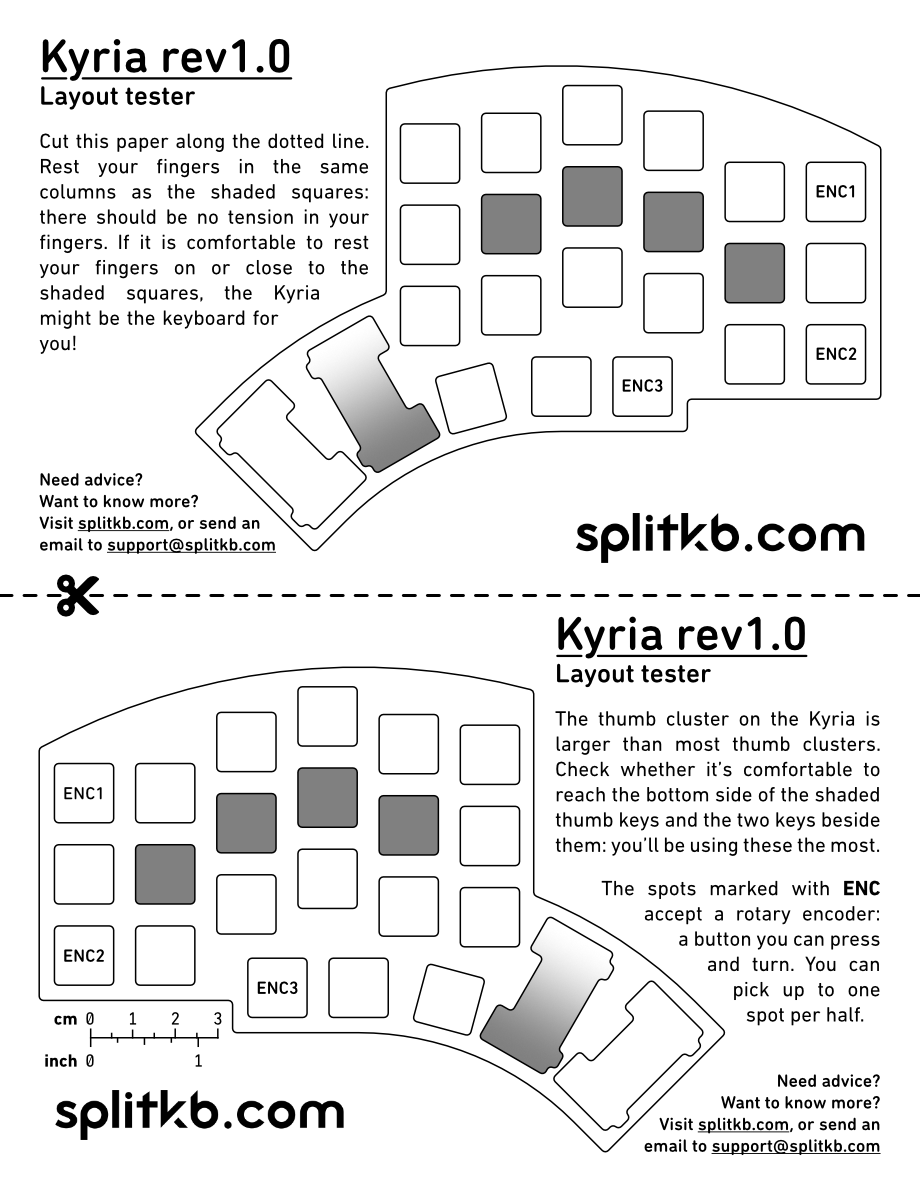
The Kyria Layout Tester
Like you’ll read below, I went through six keyboards while trying to find one that fit for me. I made this layout tester that you can print in both US Letter and A4 sizes, which should print to scale. They’ll make it easier to try the layout. Follow the instructions on there and you’ll get a good shot at knowing whether the Kyria will be your next keyboard.
Keep in mind that selecting a keyboard is personal. What works for me may not work for you. I recommend going to a keyboard meetup in your area, or printing a layout tester to get an idea for what could work.
To make it short, let’s list what I’ve tried and why I’ve moved on to the next keyboard in the list:
- Ergodox EZ: The Ergodox EZ is a very user friendly keyboard. Its configurator makes it very intuitive to get started customizing your keymap, and the amount of keys it has makes for easy experimentation with smaller layouts, as you only have to assign the keys you use. I found that the spacing between the main keys and the thumb cluster didn’t feel comfortable, and I couldn’t get used to that. I sold my Ergodox and moved on to the next keyboard.
- Iris: The Iris by keeb.io is one of the most popular split keyboards. It has a number row which I was still looking for at the time. After a while of using it, I found I preferred using a number pad layer instead of having a number row. The thumb cluster also wasn’t up my alley, the angle didn’t seem to work for me. Moving on!
- Corne: The thumb cluster seemed the most appealing of the split keyboards I found so far. I decided I didn’t need a number row anymore, and so I built a Corne (designed by Foostan). It only had a Google Translated guide at that point, and so I set forth to write my own English build log for the Corne while I was building it. The build guide remains one of my most popular posts to this day, but the Corne has since been sold: I couldn’t really get used to the stagger of the board, often hitting the wrong keys with my pinky.
- Nyquist: Going for something completely different this time, the Nyquist is an ortholinear split keyboard by keeb.io. It only took a few hours to decide that ortholinear wasn’t really my jam after all, I need my thumb cluster and stagger. Keyboards are personal, after all.
- ErgoDash Mini: Designed by omkbd, I went ahead and ordered my first set of PCBs on my own and tried sourcing my own parts. That went pretty well (though I accidentally ordered the wrong size resistors, which was fixed by a second order). I again decided that it had too many keys after all, and I couldn’t get used to the stagger. At the time, I couldn’t really pinpoint that feeling, though.
- Minidox: Designed by Chirstopher Poole, also known as the designer of the Elite C, the Minidox was the smallest keyboard I’d tried so far. In hindsight, it’s much like a Corne with one of the columns stripped off, though I did make a very pretty case for it. This time, it didn’t have too many keys, and I found I actually did want to use some of the keys that the ErgoDash Mini offered.
At this point, I was six keyboards in. While I could’ve decided to try one more keyboard, I was starting to get good at designing keyboard cases. Somewhere along the line I designed cases for the UT47.2 which is 40% form factor keyboard, and then too for the Gergo and Georgi, both designed by Jane Bernhardt at gboards.ca. I felt confident that I could design my own keyboard, so I had a stab at drafting up my own layout.
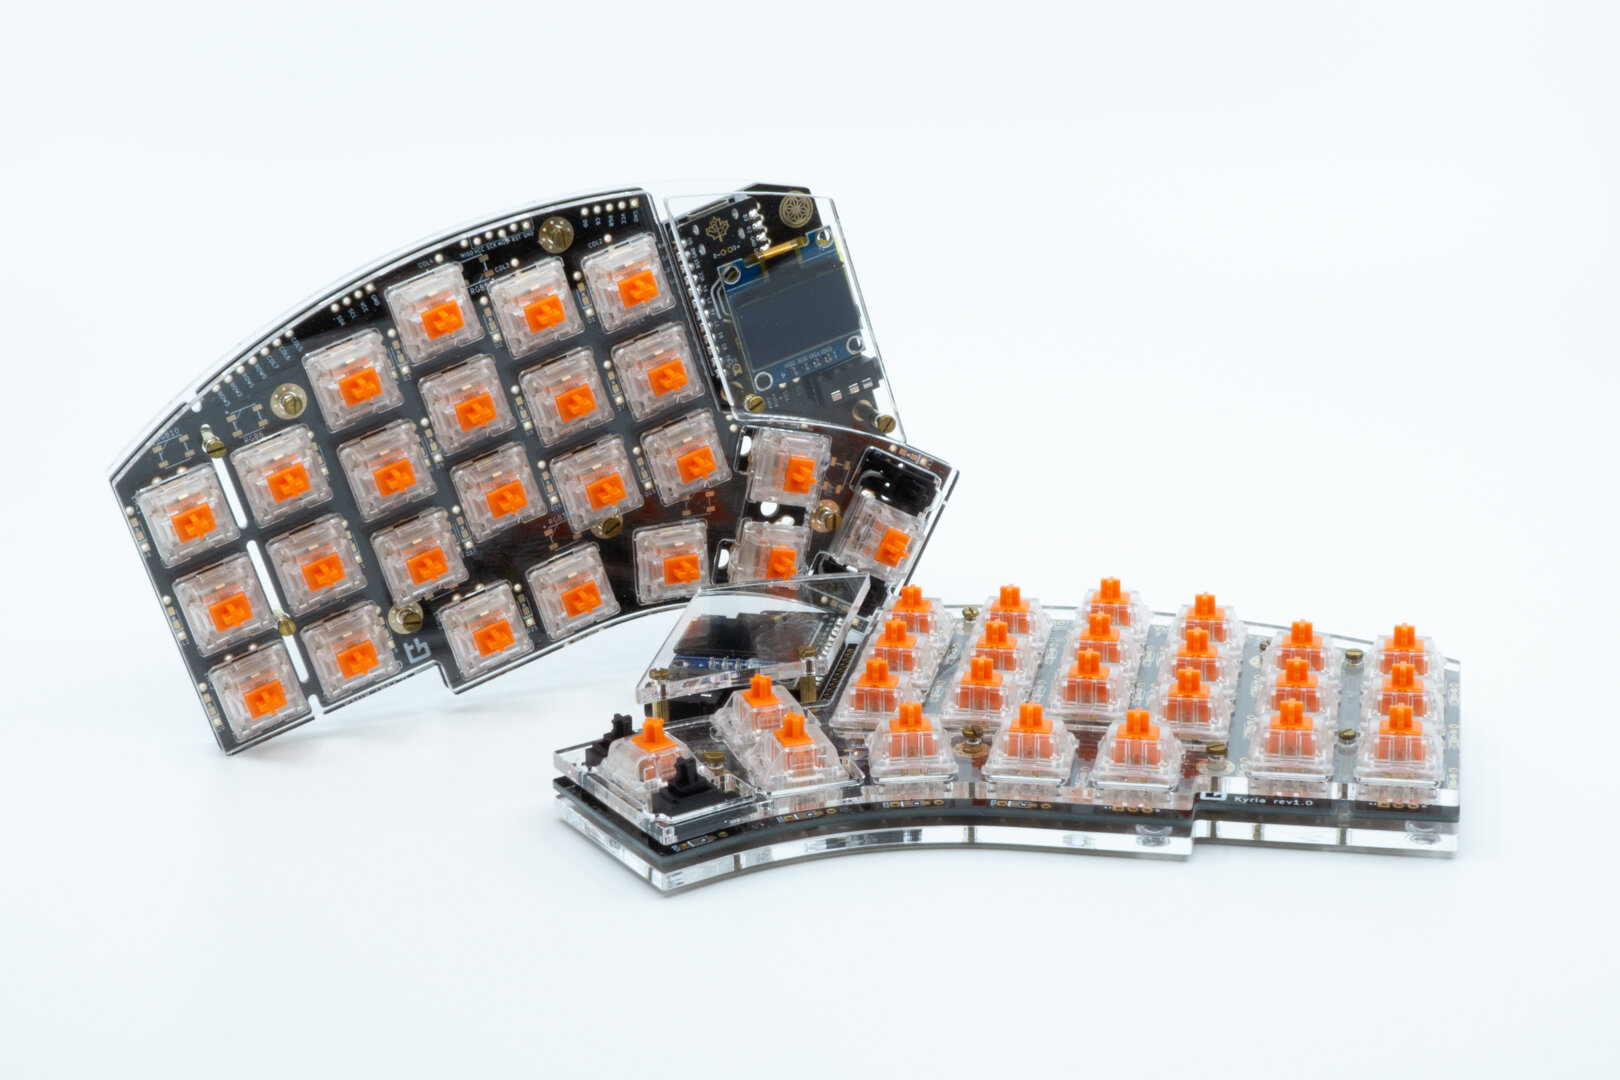
Kyria PCB Kit
The Kyria is available as a kit you can assemble yourself. A build service is also available. Click on the link below to purchase the kit. Also check out the build guide, you’ll find it’s easier than you might think!
Making the Kyria
The Kyria had one main goal: to be comfortable to use for myself. Apparently, the keyboards I’d tried up until now didn’t fit my hands one way or another, but there had to be a way! At this point, I didn’t see myself selling keyboards yet, I just wanted a keyboard that fit me, after trying so many options.
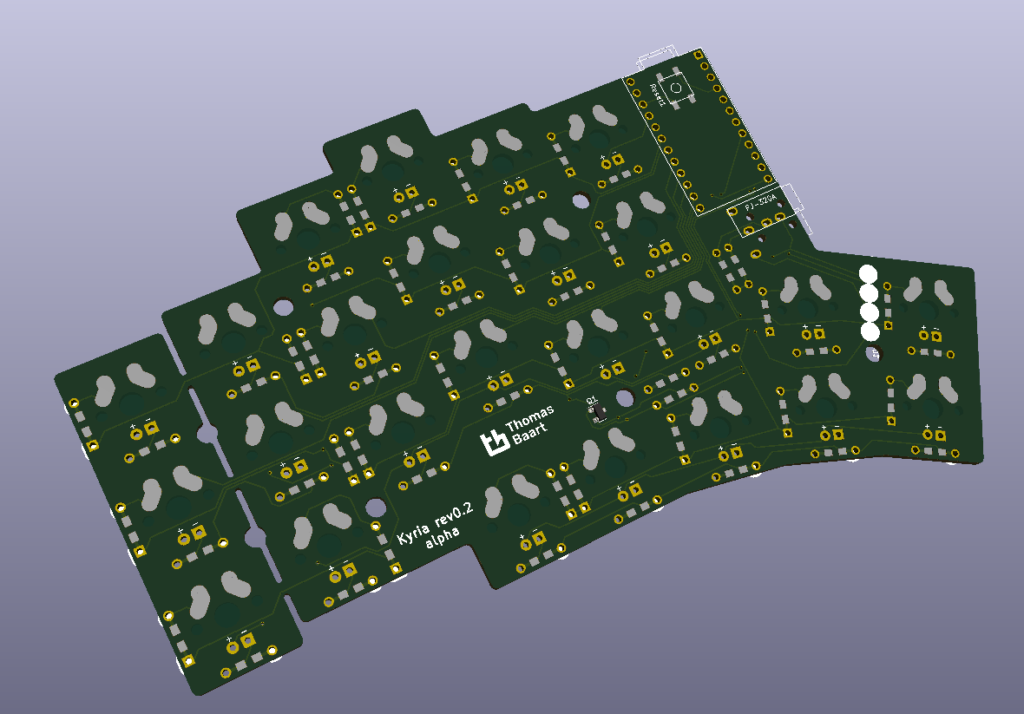
Revision 0.2 of the Kyria. Revision 0.1 used SMD components, but I didn’t feel comfortable enough using those yet.
I figured the easiest way to get started is by using pen and paper. I put my hands on paper like I would on a split keyboard: my arms extended forward, hands and fingers in a rested position. I let go of tension, and went to work: I marked the points where my nails ended up on the paper, then moved my fingers a key position up and down from that rested “home” position, and again marked the spots. I did the same, even for the thumb, where I marked the arc in which it moved and tried out several home positions.
I wish I had made pictures along the way, but it ended up being quite a mess on paper. Once retraced into Fusion 360, which I use for my designs, it thankfully became a lot more organized. To test, I printed the test plate using a 3D printer and inserted switches and keycaps into it to get a more realistic feel for the keyboard. I altered the position of keys in the design, printed one more version, and went to work designing the PCB.
Goals
I had revision 0.2 made, and assembled a keyboard for myself. I tried using it at work and noticed it went pretty well already, though there were plenty of things I’d want to change. I figured I’d like to use 2u keycaps in place of 1u keycaps on part of the thumb cluster, and I figured a rotary encoder would be useful for scrolling, which I did a lot. A few design goals started to form:
- Stagger: The stagger is one of the things that makes the Kyria unique. Most keyboards don’t have as aggressive a stagger as the Kyria has, the outer columns are noticeably lower than the other columns, because the pinky is also noticeably shorter. I really liked the feel this provided, so this would be kept in the design.
- Thumb cluster: The thumbs are stronger than the pinky, and the pinky fingers are used for many functions. I felt like placing more emphasis on the thumbs would be more comfortable, so I wanted many keys on the thumb cluster to make the keyboard flexible in assigning functions to the thumbs. After using the Kyria for over half a year, I think I made the right decision.
- Rotary encoders: Rotary encoders started becoming more known in the keyboard world, mainly being used on macropads. I felt like they’d be useful on keyboards too. You should check out How can I use a rotary encoder? on the docs site if you want to read all about the uses for encoders.
- Moddability: I was fond of making my own cases, and saw some of the modifications that were made in the community, such as adding joysticks, pointing devices, buzzers and more to keyboards. I wanted to try that myself too, and figured I should make it easy to mod the Kyria. In the end, the Pro Micro doesn’t provide enough pins to use all functionality of the Kyria and add your own mods (unless you use I2C), but the idea was neat. You can learn more about which pins the Kyria uses if you’re curious.
Iterating
From then on, I iterated on the design to try and match with the goals I defined. Being active on Discord proved very useful, as there were a few people on the #kb-ergo channel in the Mechkeys Discord server who helped me a lot by giving me feedback and even buying some of my prototypes. One of the things I doubted about early on was the ragged top edge of the Kyria in revision 0.2, and after feedback I changed it to the arc, which in hindsight does look a lot better.
In revision 0.3, I added the option to use 2u thumb keys, and added a spot to use your rotary encoder on both thumb clusters. I also added RGB underglow and an OLED display as features.
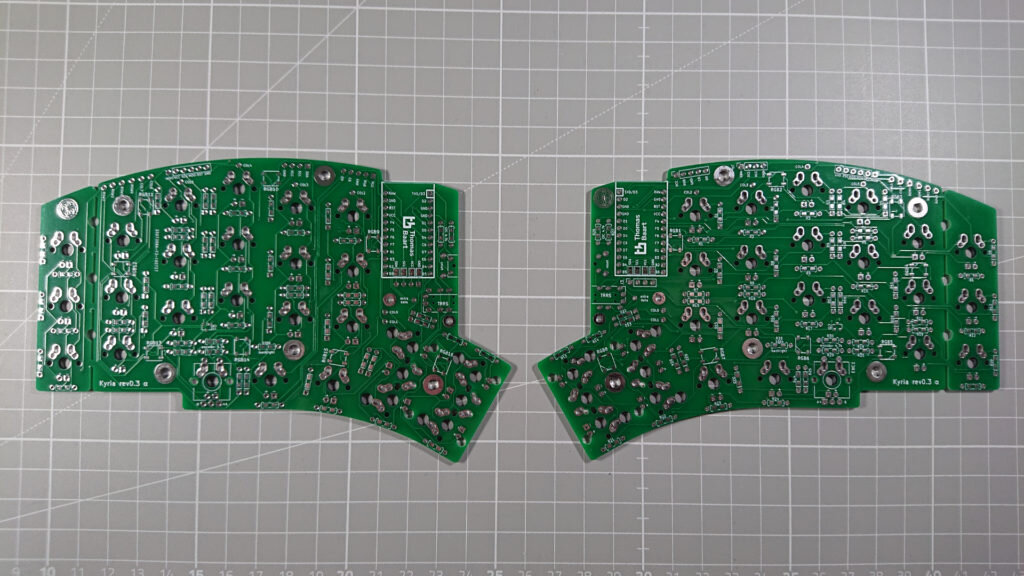
Revision 0.3
The Kyria starts to look a lot like the current revision already. There are still plenty of things that needed changing under the hood, though.
From revision 0.3 to 0.6, I changed quite a few things, most of them technical. The OLED displays didn’t work out of the box due to me using a wrong Pro Micro footprint in KiCAD, and I changed some other technicalities in between revisions.
Revision 0.6 was a revision that saw some more people buying prototypes and providing me with valuable feedback. I had been using earlier revisions of the Kyria too. I found that the thumb cluster was still a bit far to reach at the outsides, so I made the angle more aggressive by increasing the angle between keys from 10 to 15 degrees. I also found that the the outermost column was seated a bit too low, and so I made it even with the column next to it. That did seem to be more comfortable.
The footprints for several components changed for the better. The Pro Micro is now reversible, making it so that the USB port and the power LEDs now face down, making the ports more structurally stable and the LEDs less annoying. The pads for the WS2812b underglow LEDs are slightly larger, making them easier to solder by hand. I altered the encoder footprints to provide a snugger fit with the side legs, and added an extra cutout hole to support the industrial EC11K encoder by ALPS which I came to like the most out of several encoders I tried.
I also had to remove the backlighting in favour of the OLED displays. I hoped I could use I2C for both displays and across halves, saving me a pin. It turned out that the microcontroller on a Pro Micro, the ATmega32u4, didn’t have enough memory to drive two displays. QMK, the firmware the Kyria is powered by, also didn’t yet have the APIs to talk to two displays at once, so a pin had to be sacrificed for the greater good.
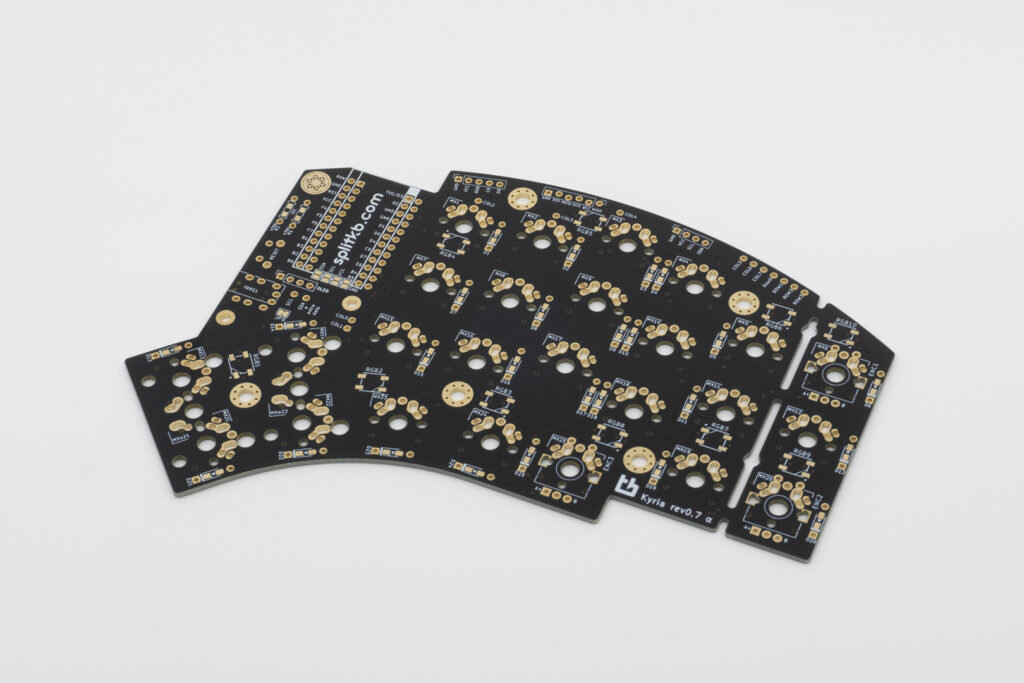
Revision 0.7
This is the version that became revision 1.0. It looks like a proper piece of kit now, especially when compared to the first version!
The Final Product
All in all, it’s been quite the journey. From trying to find a keyboard I’d like to use, to actually setting up a company and selling my keyboard to other people. At the time I’m writing this, over a hundred Kyria keyboards are actively being used, with more being shipped and built every day. I’m very happy with how the design turned out, and I’m even more happy with all the kind words of encouragement I received along the way. I’ll be working every day to provide better keyboards and the help and guidance necessary.
I hope you’ve enjoyed reading this post. If you’ve come this far, why not join my Discord server so you’ll be able to keep up with the news and chat with others about split keyboards? You can also follow me on Instagram where I’ll be sharing pictures of the Kyria and other projects I’m working on.
And, since I have to sell keyboards to keep making keyboards, check out what’s in store on splitkb.com. There’ll be more to see in the coming months, so be sure to check back in every once in a while.
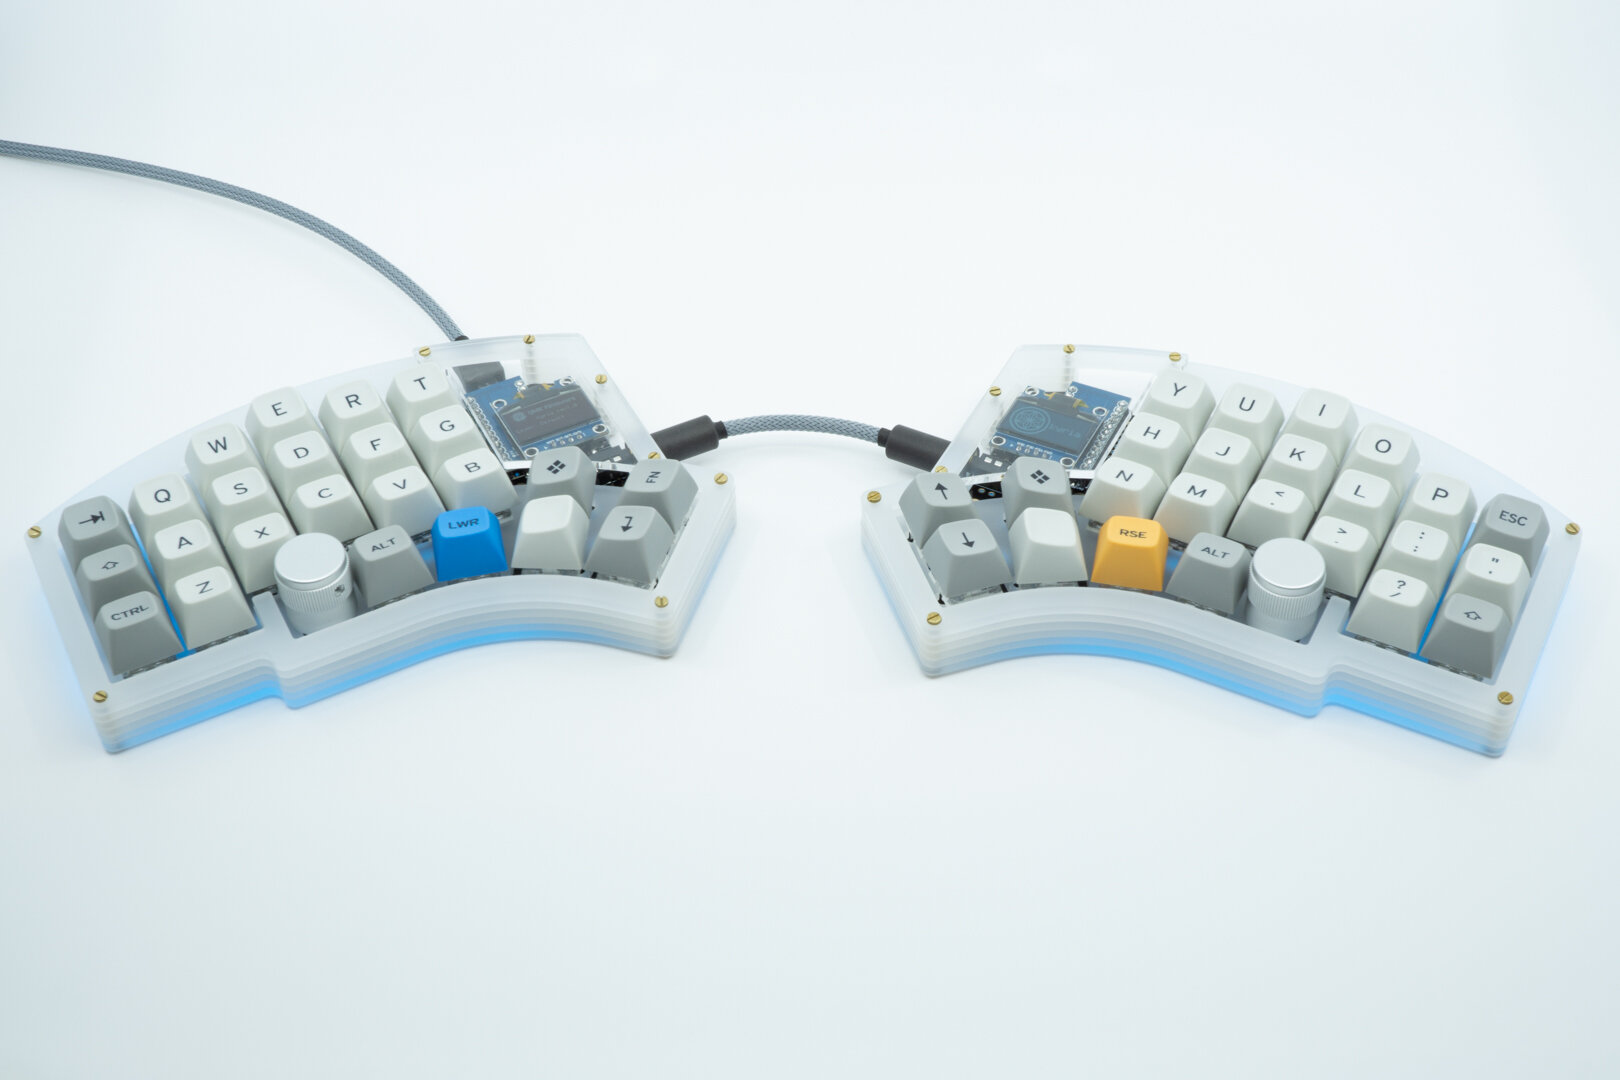
For the photo, the halves of the Kyria are pointed toward each other. In use, you’d probably want to use a longer cable in the middle, or at least have the halves point the other way ;)